Watch the agents work a board
Every line below is the agent's own reasoning from the run log. Hover the chart for each step; filter the feed by agent.
Chickadee (0400)
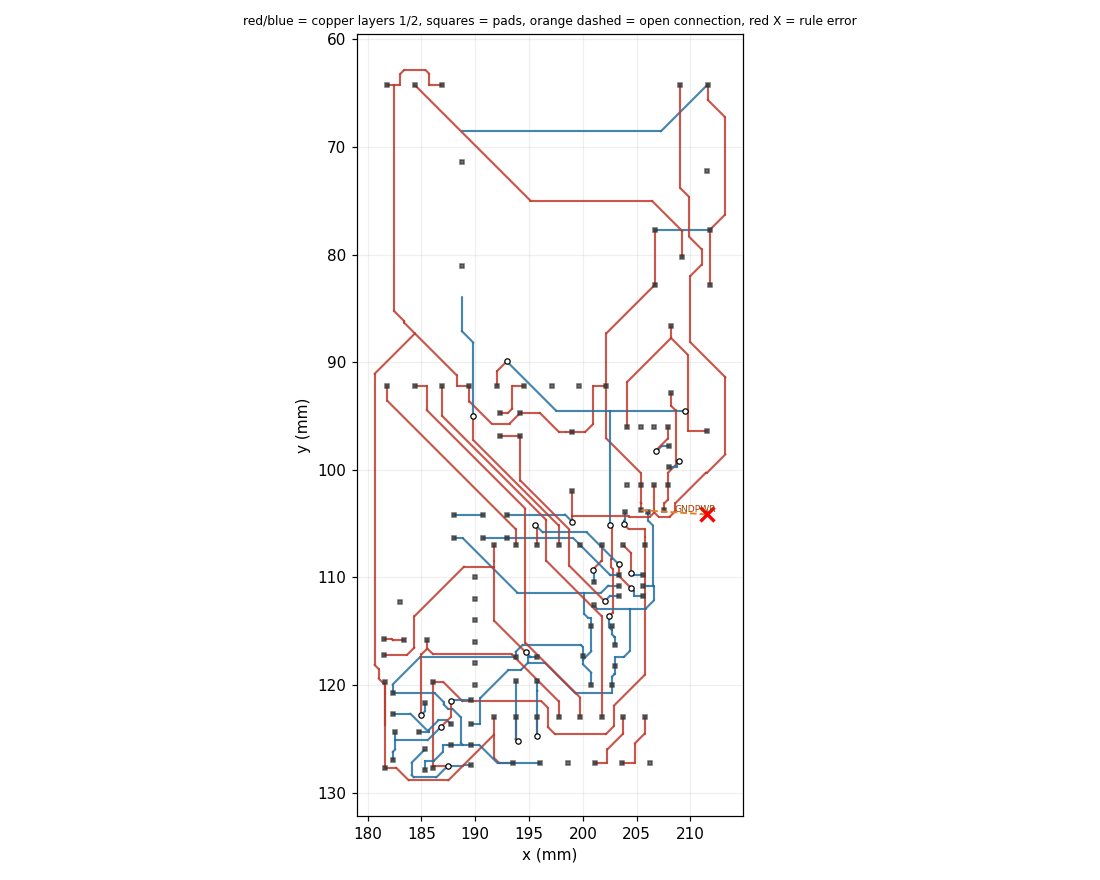
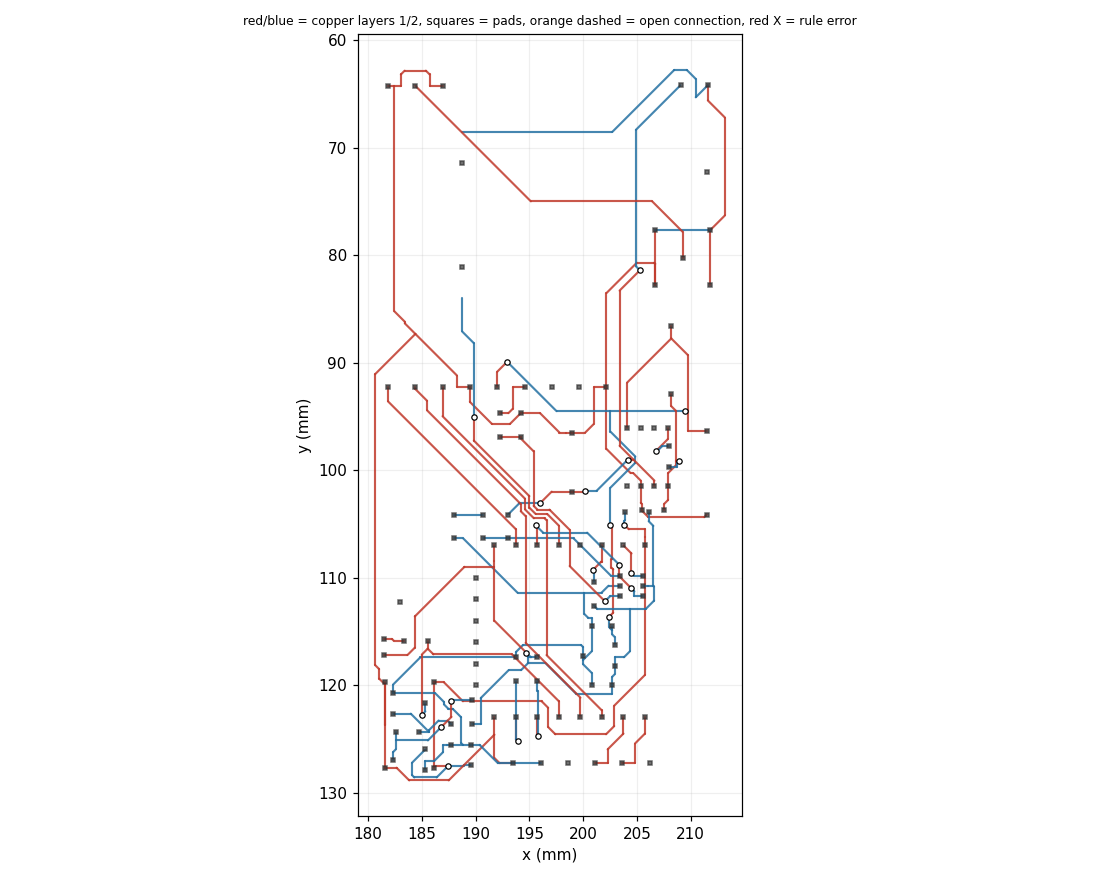
Open connections after each step
a rip-up pushes it up firstWhat Gemini decided
straight from llm_calls.jsonlMove +BATT first: it has only 4 pads, crosses the open GNDPWR path twice on top copper (layer 0), and sits right at the DRC error (red X) near (211.5, 104.1). Reroute or nudge +BATT to clear the rule violation at that pad. Leave all other nets and the existing 30-pad GNDPWR network alone. Use a via bridge to bottom copper (layer 1), which is completely open around x = 205–212, y = 104: either drop GNDPWR onto bottom copper to duck under +BATT, or bridge +BATT onto bottom copper.
Net 2 (GNDPWR) has a single short open connection crossed by net 7 (+BATT) on layer 0. Let's try routing net 2 directly with shove mode first.
Net 2 (GNDPWR) has a short open connection crossed by net 7 (+BATT) on layer 0. Try route_via on net 2 first to see if a via bridge can jump over +BATT.
Net 2 (GNDPWR) is crossed by net 7 (+BATT) on layer 0; following the layer-first strategy, try route_via on net 2 first.
Net 2 (GNDPWR) has a single short open connection crossed by net 7 (+BATT) on layer 0. Let's try route_via on net 2 to bridge over +BATT without ripping up any nets.
route on net 2 with mode 1 failed, so try route_via to bridge over the +BATT crossings on layer 0.
route_via on GNDPWR (net 2) failed because +BATT (net 7) walls it off on layer 0. Rip up +BATT (only 4 pads) to clear space for GNDPWR.
route_via on net 2 (GNDPWR) failed to close the connection. Net 7 (+BATT) crosses the path twice on layer 0 and only has 4 pads, so I will rip up net 7 to clear the way.
route_via on GNDPWR failed because +BATT (net 7, 4 pads) blocks it on layer 0. Rip up +BATT so GNDPWR can be routed cleanly.
GNDPWR (net 2) is blocked by +BATT (net 7) on layer 0, and both route and route_via on net 2 failed. Rip up +BATT (net 7, only 4 pads) to clear the path for GNDPWR.
Net 7 (+BATT) was ripped up and net 2 (GNDPWR) now has no crossings, so route net 2 using route_via.
Net 7 (+BATT) is ripped up and net 2 (GNDPWR) now has no crossings, so route net 2 first.
Net 2 (GNDPWR) now has no crossings on its open connection after ripping up +BATT, so we should route it first.
Now that +BATT (net 7) is ripped up, GNDPWR (net 2) has no crossings. Let's route GNDPWR on its current layer.
GNDPWR (net 2) is now closed; route +BATT (net 7) using via bridges to clear the crossing nets.
GNDPWR is now closed, and +BATT (net 7) has 3 open connections; try route_via on net 7 to bridge onto bottom copper.
GNDPWR (net 2) is now routed. Next, route +BATT (net 7) using route_via so it can bridge onto bottom copper to clear the crossing nets.
GNDPWR (net 2) is now routed, leaving only +BATT (net 7) with 3 open connections. Let's use route_via on net 7 to bridge over the crossing nets.
data-manager (0473)
Open connections after each step
a rip-up pushes it up firstWhat Gemini decided
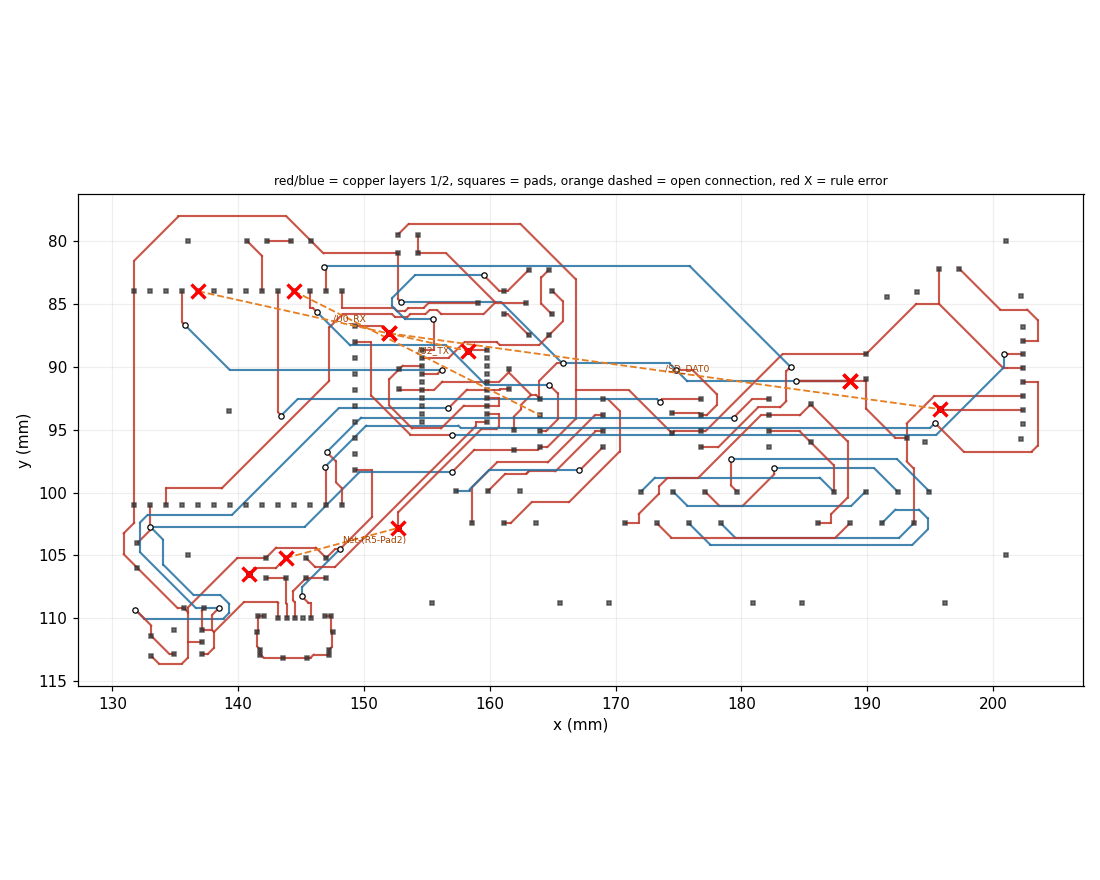
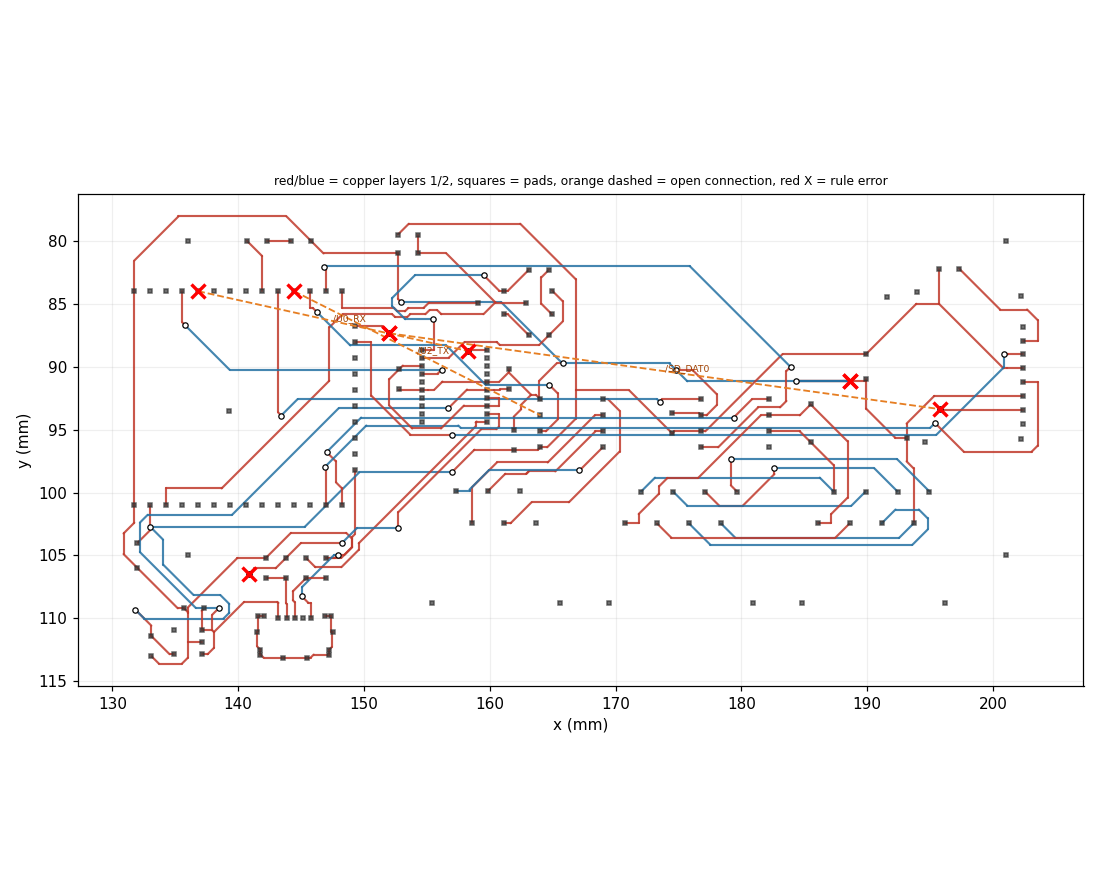
straight from llm_calls.jsonlMove first: Reroute 2-pad nets /U2_RX and /CAN_TX first; their bottom-layer traces are the only obstacles blocking clean bottom paths for /U0_RX and /U2_TX. Leave alone: Keep high-fanout power and control nets (GND, +3V3, +5V, /RESET, /RTS, /DTR) intact. Via bridges: Use a bottom-layer via bridge for Net-(R5-Pad2) to pass directly beneath top-layer GND and Net-(R4-Pad2). Once /U2_RX and /CAN_TX are cleared, bridge /U0_RX and /U2_TX on bottom copper under top-layer congestion. Route /SD_DAT0 on bottom copper under +3V3 and /CAN_RX, adding short top-layer via bridges over bottom GND.
Net 58 (Net-(R5-Pad2)) is the shortest open connection (9.23 mm) and only crossed by two nets; try routing it directly with shove mode first.
Net 58 is the shortest open connection (9.23mm) with only two crossing nets; try route_via with shove mode first.
Following layer-first style, try route_via on net 58 first as it is short and only crossed on layer 0.
Net 58 is short (9.23 mm) and only crossed on layer 0, so route_via with shove should be able to bridge over it.
Net 58 failed to route on its current layer with shove mode, and its crossings are only on layer 0, so a via bridge to another layer should easily complete it.
Try routing open net 40 (/U2_TX) using via bridges with shove mode before ripping up any blocking nets.
Try route_via on open net 40 (/U2_TX) first, following the layer-first strategy.
Net 40 (/U2_TX) is a short 2-pad signal net; try route_via with shove mode first to see if it can bridge across the obstacles without ripping anything up.
Net 40 (/U2_TX) is open; try routing it directly with shove mode first before attempting vias or ripups.
Rip up 2-pad nets /U2_RX (39) and /CAN_TX (41) to clear the bottom-layer obstacles blocking /U2_TX (40) and /U0_RX (42).
Try route_via on /U0_RX (net 42) next to see if a via bridge can close it before ripping any obstacles.
Rip up 2-pad nets /U2_RX (39) and /CAN_TX (41) as advised to clear their bottom-layer obstacles blocking /U0_RX and /U2_TX.
Single-layer routing for net 40 (/U2_TX) failed, so try a via bridge to complete it across layers.
Now that /U2_RX and /CAN_TX are ripped up, try routing /U2_TX (net 40) with a via bridge.
Try route_via on the remaining open connection /SD_DAT0 (net 61) before ripping any blocking nets.
Net 39 (/U2_RX) was just ripped up to clear bottom-layer obstacles; reroute it with route_via so it can use via bridges around top and bottom congestion.
Net 40 (/U2_TX) failed to route with both route and route_via. Following the lead engineer's note, I will rip up net 39 (/U2_RX) first, as it is a 2-pad net blocking both /U2_TX and /U0_RX on the bottom layer.
With /U2_RX and /CAN_TX cleared and /U2_TX routed, route /U0_RX (net 42) using via bridges.
route_via failed on all three open nets. Ripping up 2-pad nets /U2_RX (39) and /CAN_TX (41) as advised to clear bottom-layer obstacles for /U0_RX and /U2_TX.
With /U2_RX and /CAN_TX ripped up, try routing /U0_RX (net 42) using route_via to bridge under top-layer congestion.
Net 39 (/U2_RX) was just ripped up; try routing it with vias using shove mode.
With /U2_TX and /U0_RX now routed, attempt to route /U2_RX (net 39) using via bridges.
With /U2_RX and /CAN_TX cleared, try route_via on /U0_RX (net 42) to bridge it on bottom copper.
Now that /U2_RX and /CAN_TX are cleared and /U0_RX is routed, try routing /U2_TX (net 40) using via bridges.
Net 41 (/CAN_TX) is a 2-pad net crossing /U2_RX, /U2_TX, and /U0_RX on the bottom layer; ripping it up will clear the path for those nets.
Net 39 failed to route via, so let's try routing net 41 (/CAN_TX) with route_via in shove mode.
With /U2_RX and /CAN_TX ripped up and /U0_RX routed, try route_via on /U2_TX (net 40) to complete it using a bottom-layer via bridge.
Nets 42 and 40 are now routed, so let's try routing net 39 (/U2_RX) with via bridges.
With /U2_RX and /CAN_TX cleared, try routing /U0_RX (net 42) using route_via to bridge on bottom copper under top-layer congestion.
route_via failed for nets 39 and 41 in the current state; try routing /SD_DAT0 (net 61) with via bridges as suggested.
Net 42 and 40 are now routed, so try route_via on open net 39 (/U2_RX) next.
Net 41 (/CAN_TX) was ripped up earlier and has not been routed yet; try route_via with shove mode.
Net 42 (/U0_RX) is now routed, so let's try routing net 41 (/CAN_TX) with a via bridge.
Net 40 (/U2_TX) heavily crosses nets 41 (/CAN_TX), 61 (/SD_DAT0), and 39 (/U2_RX), blocking their via bridges. Rip up net 40 to clear space.
Net 39 (/U2_RX) failed route_via, so let's try route_via on the next open connection, net 41 (/CAN_TX), before ripping anything.
Nets 39 and 41 just failed route_via. Let's try routing net 61 (/SD_DAT0) with route_via.
Net 61 (/SD_DAT0) has not been attempted with route_via yet; try bridging it with vias.
With /U2_TX (40) just ripped up, try routing /U2_RX (39) using route_via in walk-around mode (mode=2) to see if it can now find a path.
route_via failed on /CAN_TX (41) and /U2_RX (39); /U2_TX (40) crosses /CAN_TX and /SD_DAT0 7 times each, so rip it to clear a path.
route_via with shove (mode 1) failed for net 39 (/U2_RX), so try walk-around (mode 2) to see if it can route around the obstacles.
Nets 39 (/U2_RX) and 41 (/CAN_TX) are now ripped up, which may have cleared the path for net 40 (/U2_TX) to route with a via bridge.
Net 41 (/CAN_TX) is only crossed by top-layer nets, so routing it via bottom copper with walk-around mode should succeed now that net 40 is cleared.
Net 40 (/U2_TX) was just ripped up; try routing net 39 (/U2_RX) with route_via now.
Net 40 (/U2_TX) is a 2-pad signal net that crosses /CAN_TX (41) 7 times, /SD_DAT0 (61) 7 times, and /U2_RX (39) once. Ripping up net 40 will clear the main obstacle for these three open connections.
Net 40 (/U2_TX) was just routed, changing the congestion around net 39 (/U2_RX). Try routing net 39 with vias now.
With /U2_TX (40) ripped up, try routing /U2_RX (39) using route_via in shove mode (mode=1).
Try route_via on /CAN_TX (net 41) in the current state before ripping any more nets.
Net 40 was just ripped up, so try routing net 41 (/CAN_TX) with vias now that net 40's copper is out of the way.
route_via with mode 1 failed for nets 39, 41, and 61; try route_via with mode 2 (walk around) on net 61 (/SD_DAT0).
Rip up 2-pad nets /U0_TX (43) and /CAN_STB (37) that cross /U2_RX (39) to clear space for routing.
Try route_via on /SD_DAT0 (net 61) since we haven't tried it in the current board state.
Net 40 (/U2_TX) was ripped up, which may have cleared space for net 39 (/U2_RX) to be routed with a via bridge.
Net 41 (/CAN_TX) has not been tried with route_via in walk-around mode (mode=2) in the current 3-open state.
With /CAN_STB and /U0_TX ripped up, try routing /CAN_TX (41) using via bridges.
Net 40 (/U2_TX) was ripped up in step 7 and has not been retried with route_via in the current state.
Restore the best board state with 3 open connections so we don't waste steps re-routing net 40.
Try routing /U2_RX (net 39) on its current layer with shove mode before ripping up any blocking nets.
Net 43 (/U0_TX) was just ripped up and has a relatively short 20.14mm path; try routing it with via bridges now that space is cleared.
route_via failed on net 39 (/U2_RX) in 90 trials; try single-layer shove routing with route mode=1.
Rip up 2-pad nets /U2_RX (39) and /CAN_TX (41) as advised by the lead engineer so they can be rerouted out of the way of /U0_RX and /U2_TX.
Net 40 (/U2_TX) crosses both /CAN_TX (net 41) and /SD_DAT0 (net 61) 7 times, blocking route_via. Ripping up net 40 should clear a path for them.
We are at 6 open connections with only 5 steps left; restore_best returns us to the 3-open state.
Net 39 (/U2_RX) failed route_via and route; ripup 2-pad net 43 (/U0_TX) which crosses it on both layers.
With /U2_RX and /CAN_TX ripped up, try routing /U0_RX (net 42) with vias to clear its open connection.
Net 40 (/U2_TX) is now ripped up, which may have cleared the path for net 39 (/U2_RX). Try route_via on net 39 with walk around mode.
Nets 39 (/U2_RX) and 41 (/CAN_TX) are blocking nets 40 (/U2_TX) and 42 (/U0_RX) on the bottom layer. Ripping them up will clear space to route 40 and 42.
Net 43 (/U0_TX) is open and we haven't tried route_via on it yet; let's try bridging it with vias.
With /U2_RX and /CAN_TX ripped up and /U0_RX routed, try routing /U2_TX (net 40) with via bridges.
Ripping up /U2_TX (40) made things worse (4 open connections instead of 3) and /U2_RX (39) still could not route. Restore the best board state with 3 open connections.
With /U2_RX and /CAN_TX ripped up, /U0_RX (net 42) should now have a clear bottom-layer path via a bridge.
Restore the best board seen so far (3 open connections) since ripping up and routing net 43 failed.
Nets 42 and 40 were just rerouted, so try route_via on net 39 (/U2_RX) with shove mode to close it.
Net 42 (/U0_RX) has not been attempted yet in this state; try route_via with shove mode to bridge it.
With /U0_RX routed and /U2_RX and /CAN_TX out of the way, try routing /U2_TX (40) with via bridges.
Try route_via on /U0_RX (net 42) to close it using a via bridge.
Net 39 failed route_via in the current state; try route_via on net 41 (/CAN_TX) now that nets 42 and 40 are routed.
With one step left, try routing /U0_RX (net 42) with a via bridge using walk-around mode (mode 2) since shove mode (mode 1) just failed.
With /U0_RX and /U2_TX now routed, try routing /U2_RX (net 39) using route_via in shove mode.
Net 40 (/U2_TX) is open; try route_via on it to close the connection with a via bridge.
route_via on nets 39 and 41 just failed in this state, so try route_via on the remaining open net 61 (/SD_DAT0) with shove mode.
RGBMatrixPanel CPLD (0599)
Open connections after each step
a rip-up pushes it up firstWhat Gemini decided
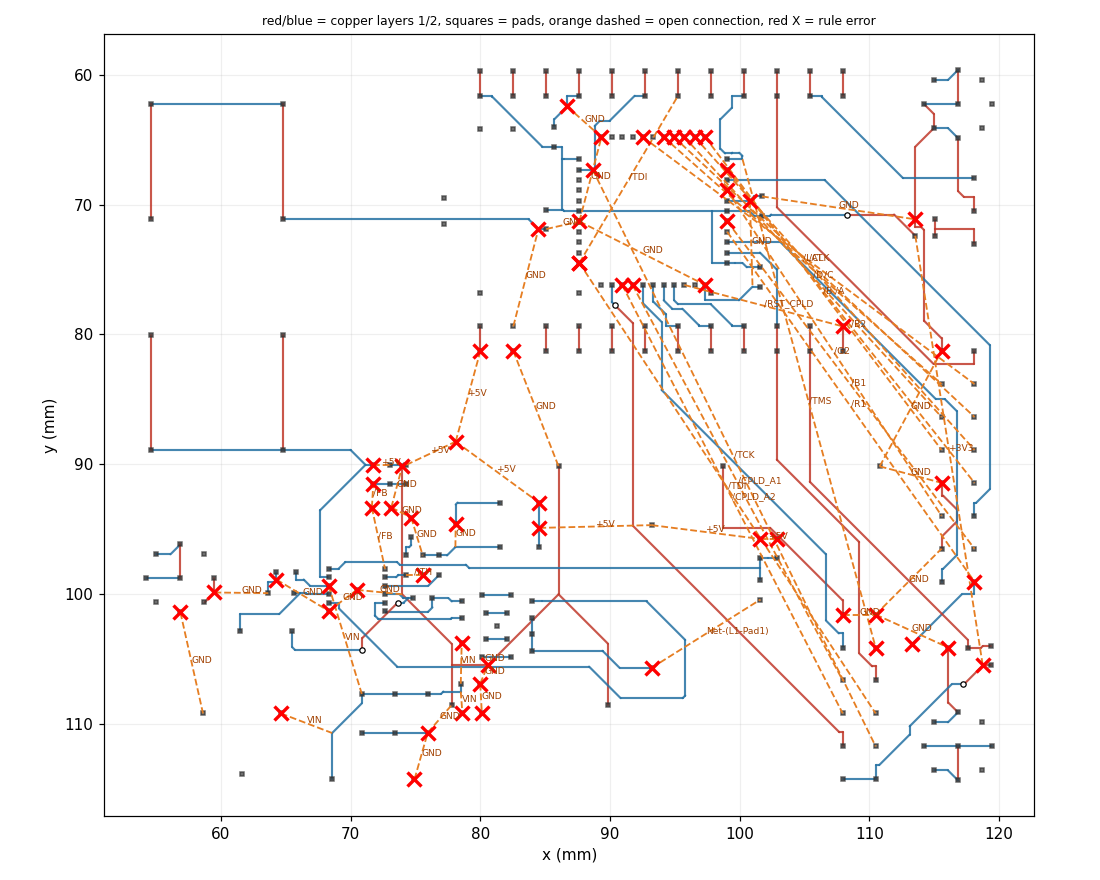
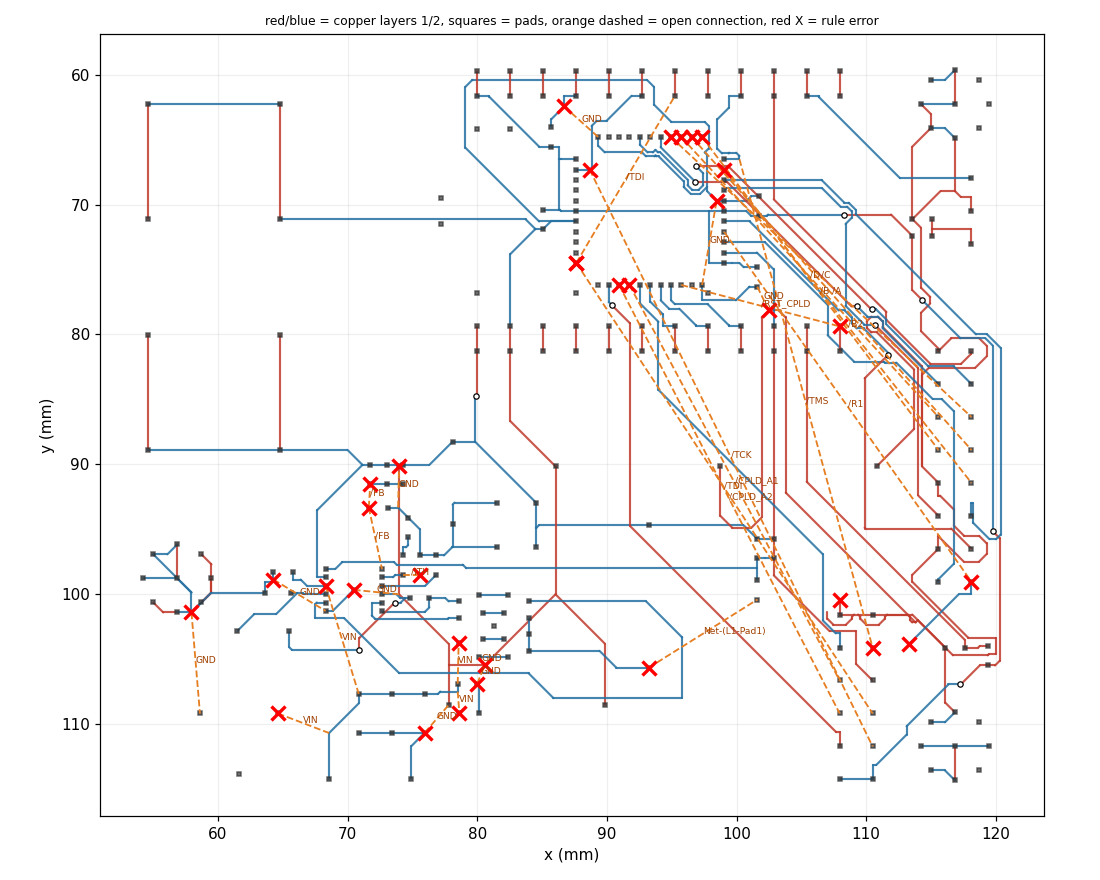
straight from llm_calls.jsonlFirst, reroute simple 2-pad nets /CPLD_A3 and /DRVL to clear local congestion and DRC errors, then finish all unblocked +5V and GND segments. Leave existing 84-pad GND traces, 5-pad /FB, and /INTVCC alone—ripping up massive ground networks or sensitive regulator/feedback traces risks cascading failures. Use via bridges where single-layer blockers remain: route +5V (84.6, 94.9 to 93.2, 94.7) on bottom copper to pass under top-layer GND (and /CPLD_A3), and bridge GND onto top copper to cross over bottom-layer /INTVCC and /FB (x=64–74, y=90–101).
Net 1 (+5V) has multiple open connections with no crossings, so routing it on its current layer with shove mode should close several connections.
Net 1 (+5V) has multiple open connections, most with no crossings. Routing it with via bridges should close several connections cleanly.
Following layer-first style, try route_via on net 1 (+5V) to close its open connections using layer changes.
Route the +5V power net (net 1) first, as most of its open connections have no crossings.
Net 1 (+5V) has only 1 open connection left after mode 1 routing; try route_via to bridge it.
Net 2 (GND) has many open connections, some with no crossings. Using route_via with shove mode should close several of them.
Net 2 (GND) has many open connections; following the layer-first style, try route_via on net 2 before ripping anything.
GND (net 2) has many open connections with no crossings; routing it with shove mode should close several connections.
Net 2 (GND) has many open connections, several with no crossings. Try routing net 2 with shove mode first to close as many as possible.
Rip up 2-pad net /DRVL (net 65) as advised to clear local congestion blocking GND segments.
route_via on GND (net 2) made 0 progress. /DRVL (net 65) is a simple 2-pad net crossing GND in multiple places, so ripping it up will clear local congestion as advised.
Rip up 2-pad net /DRVL (net 65) as advised to clear local congestion blocking GND segments.
GND (net 2) still has 10 open connections blocked by single-layer traces like /INTVCC and /FB; use route_via to bridge GND across them.
Net 65 was just ripped up to clear local congestion; reroute it cleanly using route_via.
Reroute net 65 which was just ripped up to clear local congestion.
Route net 65 that was just ripped up to clear local congestion.
GND (net 2) is blocked by the 2-pad net /DRVL (net 65) at two locations, and route_via on GND failed. Ripping up /DRVL (net 65) will clear local congestion so GND can be routed.
route_via failed on net 65, so try single-layer shove routing to reconnect it.
Net 65 was ripped up and route_via failed to close it, so try single-layer routing with shove mode.
Complete the remaining +5V connection using route_via so it can change layers if blocked on its current layer.
We just ripped up net 65 to clear congestion; now let's reroute net 65 cleanly.
GND (net 2) has many unblocked open connections; routing it on its current layer with shove mode should close the unblocked segments.
We haven't tried single-layer routing on GND (net 2) yet; let's route all unblocked GND segments on their current layer.
GND (net 2) has several open connections, some unblocked and others crossed by bottom-layer /INTVCC and /FB. Using route_via on net 2 will route the unblocked segments and bridge over the bottom-layer blockers.
Net 7 (/LAT) is a 2-pad signal net crossed by GND and +3V3; trying route_via to bridge across the blockers.
GND (net 2) now has only 11 open connections, several of which are blocked by bottom-layer /INTVCC and /FB; trying route_via on net 2 will bridge GND onto top copper.
GND (net 2) now has only 11 open connections left, several of which cross /INTVCC and /FB on layer 2. Trying route_via on net 2 to bridge those crossings onto top copper.
route_via on GND failed; try route_via on 2-pad signal net /LAT (net 7) to clear an open connection.
Net 4 (/R1) is a 2-pad signal net with an open connection; try routing it with a via bridge.
route_via on GND made no progress; let's try routing /LAT (net 7) with vias to close its open connection.
route_via on net 2 failed to make any connections; try route_via on net 3 (+3V3) per layer-first style.
Route power net +3V3 (net 3) using route_via to bridge across GND and signal traces.
Net 8 (/B1) is a 2-pad signal net that is open and crossed by several traces; try routing it with vias.
Net 4 (/R1) is a 2-pad net with one open connection crossed by several nets on both layers; route_via can bridge across them.
Try route_via on open net 4 (/R1) before ripping any blocking nets.
GND route_via failed earlier, and we have several 2-pad signal nets open. Let's try routing /R1 (net 4) with vias.
Net 9 (/CLK) is a 2-pad signal net that is open; trying route_via to bridge across the blocking traces.
Net 8 (/B1) has not been tried with route_via yet; let's attempt to route it using via bridges.
Following layer-first style, try route_via on open net 7 (/LAT) before ripping any blockers.
GND (net 2) has 10 open connections, several with no direct crossings, so trying walk-around mode (mode=2) may resolve some of them.
Try routing 2-pad net 10 (/D) with vias to reduce open connections.
Net 3 (+3V3) has an open connection that hasn't been tried with route_via yet; let's attempt to route it using vias.
Net 8 (/B1) has an open connection and has not been tried with route_via yet; try via bridging before ripping any blockers.
Net 8 (/B1) is an open 2-pad signal net crossed by several traces on both layers; try routing it with vias.
Net 12 (/C) is a 2-pad signal net that hasn't been attempted yet; try routing it with vias.
Net 9 (/CLK) is a 2-pad net that has not been attempted yet; route_via may close it by bridging over blockers.
Net 9 (/CLK) is open and hasn't been tried with route_via yet. Trying route_via first per layer-first style.
Net 12 (/C) has not been attempted yet and has fewer crossings than /CLK or /R1; try routing it with vias.
Net 3 (+3V3) has an open connection that hasn't been tried with route_via yet; let's try bridging it.
Try routing /D (net 10) with via bridges to clear one of the long open signal connections.
Following the layer-first strategy, try route_via on open net 10 (/D) before ripping anything.
GND (net 2) has 10 open connections, several with no crossings, and we haven't tried routing it with shove (mode 1) yet.
GND (net 2) has several unblocked open connections (crossed_by is empty); routing on its current layer with shove mode should close them.
Net 12 (/C) has not been attempted yet and is crossed by nets on both layers, so route_via with shove mode is the best first attempt.
Following the layer-first style, try route_via on open net 12 (/C) before ripping any blocking nets.
GND routing failed in both modes and route_via; try route_via on /CLK (net 9) which hasn't been attempted yet.
Single-layer routing for GND (net 2) made 0 connections. Trying route_via to bridge GND onto top copper over bottom-layer blockers like /INTVCC and /FB.
GND (net 2) has several open connections with no crossings that failed under shove mode; try walk-around mode (mode=2) to close them.
route_via failed on all remaining open nets (2, 4, 10, 12). Net 65 (/DRVL) is a small 2-pad net that crosses two open GND connections, so ripping it up will unblock GND.
Net 10 (/D) has not been attempted yet; try route_via with shove mode to bridge across the blocking traces.
Net 13 (/G2) has not been tried yet; let's attempt route_via in shove mode to see if it can bridge across.
Net 65 (/DRVL) is a simple 2-pad net that blocks two GND connections. Ripping it up will clear space to route GND, and then we can re-route /DRVL.
Net 65 was just ripped up to clear congestion; route it now using via bridges if needed.
Net 13 (/G2) is an open 2-pad signal net that has not been attempted yet; try routing it with via bridges.
Net 14 (/B) has not been attempted with route_via yet; try bridging it across the blocking traces.
Reroute net 65 that was just ripped up using route_via with shove mode to clear local congestion.
Several GND (net 2) connections have no crossings, and route_via failed earlier, so try same-layer routing on net 2.
GND (net 2) has 10 open connections, several of which are blocked by bottom-layer /INTVCC, /FB, /DRVL, /TCK, and +3V3. Using route_via on net 2 should bridge these blockers.
GND (net 2) has several unblocked open connections, and shove mode failed to route any of them. Trying walk-around mode (mode=2) to see if it can complete the unblocked GND segments.
Ripping up net 65 increased open connections to 34 and route_via failed to close it, so restore the best board seen so far (33 open connections).
Net 2 (GND) still has 10 open connections, several of which are crossed by single-layer traces; try route_via on net 2 to bridge over them.
Net 14 (/B) has not been attempted yet; trying route_via with shove mode to see if it can find a path.
Net 4 (/R1) is open and has not been tried with route_via yet; let's attempt a via bridge to route it.
GND (net 2) has 11 open connections, many of which are blocked by single-layer traces on layer 2. Using route_via can bridge GND over them.
Net 13 (/G2) has not been tried with route_via yet; trying route_via to see if it can bridge across the blockers.
route_via on GND (net 2) with mode 1 failed, so try mode 2 (walk around) to bridge over the single-layer blockers.
With 1 step left, try route_via on GND (net 2) with walk-around mode (mode 2) to close any of its remaining open connections without increasing open count.
Net 4 (/R1) is an open 2-pad connection that hasn't been attempted with route_via in the current state.
Try route_via on net 4 (/R1) as it has not been attempted yet in this state.
Net 4 (/R1) is an open 2-pad signal net that has not been attempted with route_via yet; try routing it with vias in shove mode.
HybridChargeController (0626)
Open connections after each step
a rip-up pushes it up firstWhat Gemini decided
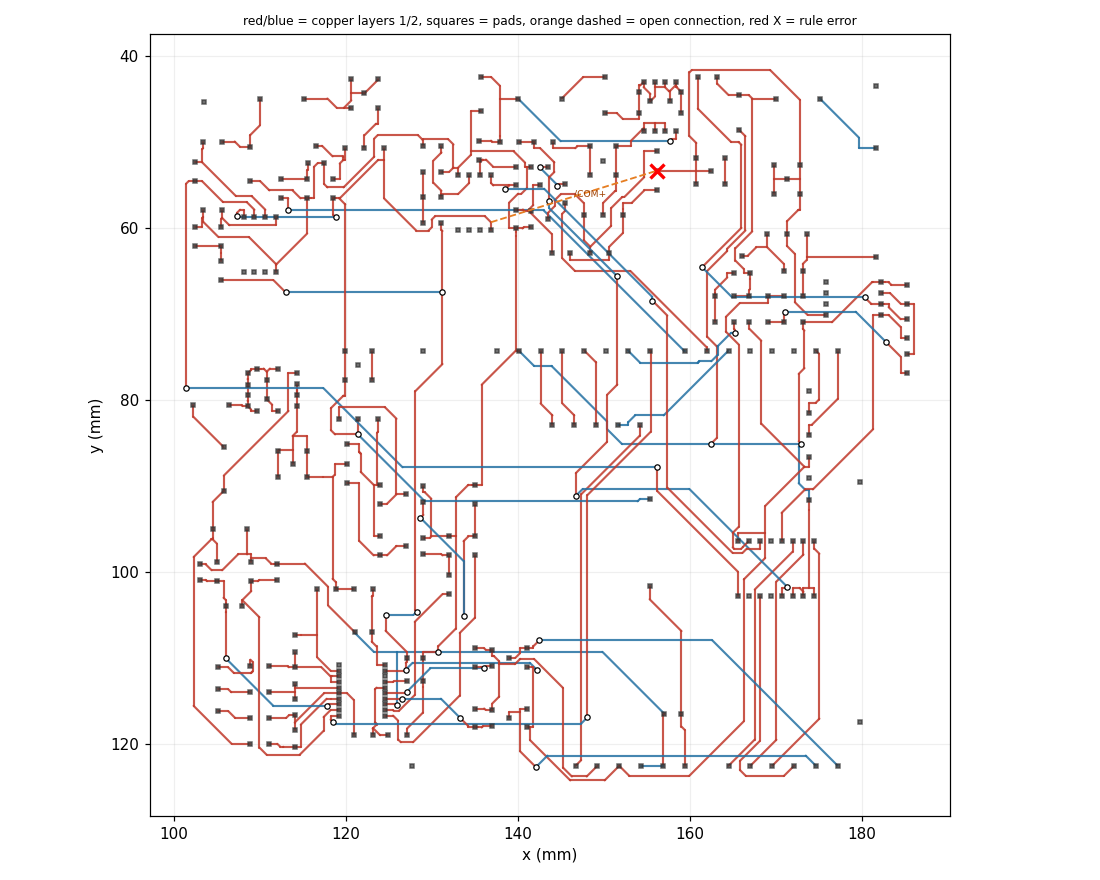
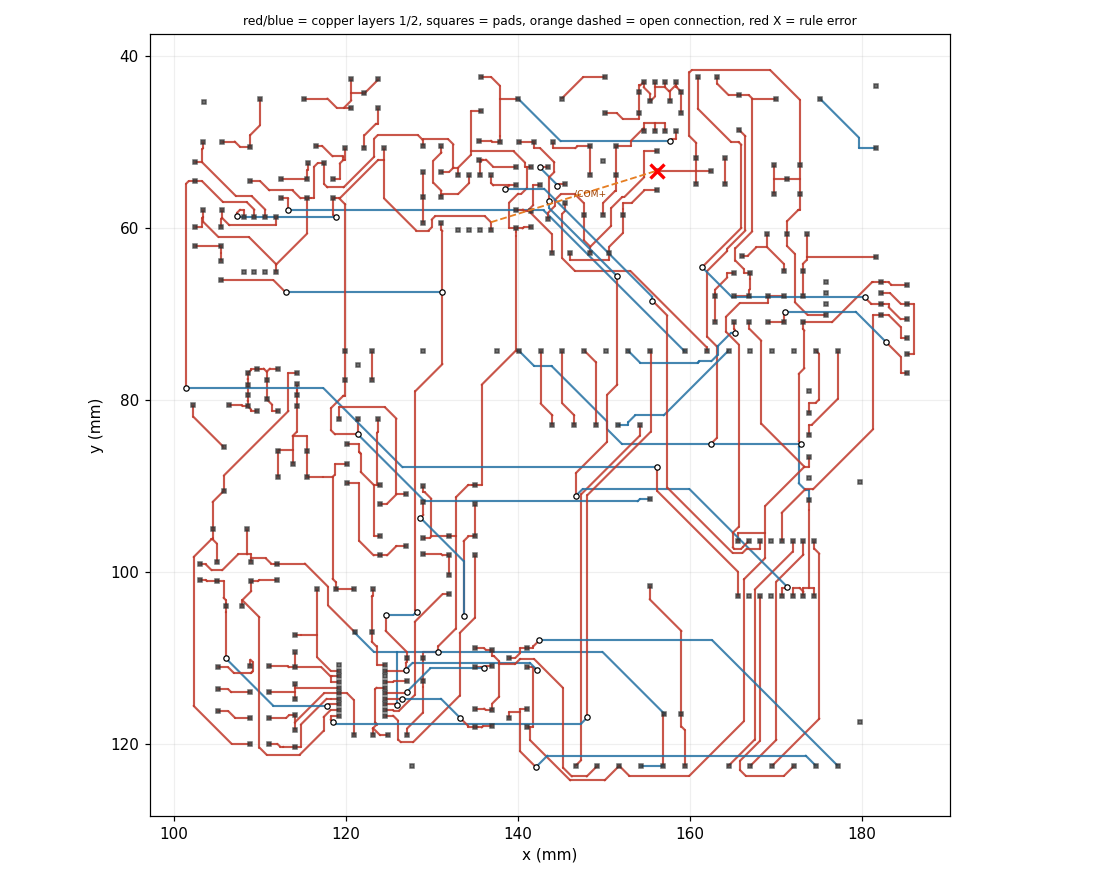
straight from llm_calls.jsonlTo connect /COM+ and clear the rule error at [156.1, 53.4]: 1. Move first: Reroute small bottom-layer nets /SW_LD (2 pads) and /S_LA_V (3 pads) out of the path, along with Net-(Q4-Pad1) (4 pads, 3 crossings) and Net-(Q6-Pad3) (4 pads) near the endpoints if needed, resolving the short/DRC violation at the red X. 2. Leave alone: Keep large top-layer nets /GND (38 pads) and /LA+ (10 pads) untouched. 3. Via bridge: Drop /COM+ onto the sparse bottom layer via a bridge to pass cleanly underneath /GND, /LA+, Net-(Q4-Pad1), and Net-(Q6-Pad3).
Net 32 (/COM+) is the only open connection. Try routing it directly with shove mode first before attempting vias or ripups.
Only net 32 (/COM+) is open. Try route_via with shove mode first to see if it can bridge over the crossing nets using vias.
Net 32 (/COM+) is the only open connection. Following the layer-first strategy, try route_via on it first to see if a via bridge can bypass the crossing nets.
Net 32 (/COM+) is the only open connection; try route_via with shove mode first to see if it can bridge across the obstacles.
Net 32 failed to route on its current layer with shove mode. Try route_via to bridge across the blocking nets.
Rip up small bottom-layer nets /SW_LD (15) and /S_LA_V (58) to clear space on the bottom layer for /COM+ (32) to bridge.
route_via on net 32 failed; rip up Net-(Q4-Pad1) (net 50) which crosses the path 3 times.
route_via on /COM+ (net 32) failed because small signal nets block both the top and bottom layers. Rip up the small blocking nets /SW_LD (15), /S_LA_V (58), Net-(Q4-Pad1) (50), and Net-(Q6-Pad3) (54) while leaving /GND and /LA+ untouched.
route_via on net 32 failed, so rip up the smallest blocking bottom-layer net 15 (/SW_LD, 2 pads) to clear space for a via bridge.
With /SW_LD and /S_LA_V ripped up, try routing /COM+ (net 32) using a via bridge.
Net 50 (Net-(Q4-Pad1)) is now ripped up, so try route_via on net 32 (/COM+) to see if it can bridge across.
We ripped up the blocking small nets (15, 58, 50). Now we route power net /COM+ (32) first using route_via to bridge underneath /GND and /LA+.
Now that /SW_LD (net 15) is ripped up, try routing /COM+ (net 32) using a via bridge.
route_via on net 32 (/COM+) still failed; rip up the small crossing nets 50 (Net-(Q4-Pad1)) and 54 (Net-(Q6-Pad3)) to clear space near the endpoints.
route_via on net 32 (/COM+) failed even after ripping net 50. Rip small bottom-layer nets 15 (/SW_LD) and 58 (/S_LA_V) to clear the bottom layer for a via bridge.
Net 32 (/COM+) failed to route via the bottom layer, likely blocked by small signal nets 61 (/S_LA_I) on layer 2 and 54 (Net-(Q6-Pad3)) on layer 0. Ripping up these small nets to clear the path.
Net 58 (/S_LA_V) is on layer 2 and crosses net 32 (/COM+), blocking a bottom-layer via bridge. Ripping up net 58 will clear the path.
With nets 15, 58, 50, and 54 ripped up, try routing net 32 (/COM+) using a via bridge.
Now that /SW_LD (15) and /S_LA_V (58) are ripped up, try route_via on /COM+ (32) to bridge underneath the top-layer nets.
With nets 61 and 54 ripped up, try route_via on /COM+ (net 32) to bridge under /GND and /LA+.
Both /SW_LD and /S_LA_V have been ripped up to clear the bottom layer; now try route_via on /COM+ (net 32).
Net 32 (/COM+) is now routed with 0 rule errors. Let's re-route the ripped-up nets starting with net 54 (Net-(Q6-Pad3)), which has short connections.
route_via on /COM+ (32) still failed after ripping up 50, 15, and 58; Net-(Q6-Pad3) (54) crosses near the endpoint and is small (4 pads), so rip it up next.
Net 32 (/COM+) is now connected. Next, route the short net 54 (Net-(Q6-Pad3)) using route_via to handle layer crossings.
Ripping up Net-(Q4-Pad1) (net 50) which has 3 crossings across /COM+ on layer 0 to clear the path for /COM+.
Net 32 (/COM+) and Net 54 are now routed. Next, route Net 50 (Net-(Q4-Pad1)) using route_via to clear its 3 open connections.
With nets 50, 15, 58, and 54 ripped up, try route_via on /COM+ (net 32) to see if it can now bridge cleanly.
Net 32 (/COM+) and net 54 (Net-(Q6-Pad3)) are now routed. Next, route net 50 (Net-(Q4-Pad1)) using route_via to clear its 3 open connections.
Net 50 has been ripped up, so let's try routing /COM+ (net 32) with a via bridge now.
Net 32, 54, and 50 are routed. Now route /SW_LD (net 15) using route_via.
Net 32 (/COM+) is now connected. Following the layer-first strategy, try route_via on the open connections of net 50 (Net-(Q4-Pad1)).
Net 15 (/SW_LD) is a 2-pad signal net with one open connection crossed by power/ground nets on both layers; route_via can bridge around them.
Net-(Q6-Pad3) (net 54) still crosses /COM+ near its endpoint; ripping it up as suggested before retrying /COM+.
Net 58 (/S_LA_V) is the only remaining open net; route_via with shove mode should complete both its short and long connections.
Net 54 (Net-(Q6-Pad3)) has three short open connections; try routing it with vias first.
Net 58 (/S_LA_V) has 2 open connections and hasn't been routed yet after ripup; try route_via with shove mode.
Now that Net-(Q6-Pad3) (net 54) is ripped up, try routing /COM+ (net 32) with a via bridge to see if the path is clear.
Net 58 (/S_LA_V) has 1 open connection left and route_via could not close it. Net 61 (/S_LA_I) has 5 crossings on both layers and only 3 pads, so ripping it up will clear space to route net 58.
Net 15 (/SW_LD) is open; try route_via first to see if it can complete by changing layers.
Net 61 (/S_LA_I) has not been routed yet since it was ripped up, and one of its two open connections has zero crossings. Let's route_via net 61 with shove mode.
Net 32 (/COM+) is now connected; next, route the short open connections of Net-(Q6-Pad3) (net 54).
Net 61 was just ripped up to clear its path; try routing it with via bridges.
Net 58 (/S_LA_V) has 2 open connections and 0 rule errors; try route_via on net 58 first.
Only net 58 (/S_LA_V) remains open with zero rule errors; try routing it with vias using shove mode.
Net 32 (/COM+) has a tiny 0.66mm open connection with no crossings, so routing it directly with shove mode should close it.
Net 58 (/S_LA_V) failed to route_via, and it is crossed by two small 2-pad nets: net 13 (/LED_BTN) on layer 2 and net 14 (/SW_LA) on layer 0. Ripping up both small nets will clear space to route net 58.
Net 58 (/S_LA_V) has 1 open connection left and route_via just failed to close it in 90 trials. Net 61 (/S_LA_I, 3 pads) crosses its path 5 times on both layers, so ripping up net 61 should clear the way.
Net 58 (/S_LA_V) is the only remaining open connection; route_via with shove mode failed, so try walk-around mode.
Net 32 (/COM+) is now routed; start re-routing the ripped-up nets beginning with net 50 (Net-(Q4-Pad1)) using shove mode.
We just ripped up nets 13 and 14 to clear space; now route net 58 (/S_LA_V) using route_via.
Net 61 (/S_LA_I) was just ripped up and now has 2 open connections; try route_via on it to complete its connections across layers.
Net 58 (/S_LA_V) is the last open connection and route_via failed in both modes. Ripping up small 2-pad signal nets 13 and 14 that cross it on layers 2 and 0 should clear a path.
Net 32 and Net 50 are routed; now try routing the open connection on small net 15 (/SW_LD) using shove mode.
Ripping up nets 13 and 14 did not help route net 58. Restore the best board (1 open connection) to save steps and try clearing a different blocker for net 58.
Net 58 (/S_LA_V) is the last open connection and is crossed twice by small net 50 (Net-(Q4-Pad1)); rip up net 50 to clear the path.
Nets 13 and 14 were ripped up to clear space; route net 58 (/S_LA_V) first with route_via mode 1 before re-routing the smaller 2-pad nets.
Net 15 (/SW_LD) failed to route on its current layer with mode 1; try route_via to bridge across the blocking nets.
Rip up the two small bottom-layer nets /SW_LD (15) and /S_LA_V (58) to clear space on the bottom layer for /COM+ (32) to use a via bridge.
Net 50 was just ripped up to clear the path for net 58. Re-route net 50 using route_via first, as it previously routed all 3 connections cleanly.
Ripping up nets 13 and 14 did not allow net 58 to route. Restore the best board (1 open connection) so we can target a net that actually crosses net 58.
Net 58 (/S_LA_V) has two open connections, one of which is a short 1.8 mm uncrossed segment. Try routing net 58 with shove mode first.
With /SW_LD and /S_LA_V ripped up, route /COM+ (net 32) using route_via to bridge underneath the top-layer nets.
Net 50 was just re-routed, potentially clearing the path for net 58. Try route_via on net 58 again.
Only net 32 (/COM+) is open; try route_via with shove mode to bridge it onto the bottom layer.
Net 58 (/S_LA_V) has 1 open connection left and 0 rule errors; try route_via with shove mode to bridge across the blocking nets.
Net 50 crosses both net 32 (/COM+) and net 58 (/S_LA_V) three times. Ripping up net 50 should clear the path for net 32.
route_via on net 58 failed, so try routing net 58 directly on its current layer with shove mode.
Ripup the small bottom-layer nets 15 (/SW_LD) and 58 (/S_LA_V) to clear the bottom layer for /COM+ (net 32) to pass via a two-via bridge.
Net 58 (/S_LA_V) failed to route with both route and route_via. Net 61 (/S_LA_I) crosses it 3 times on both layers and has only 3 pads, so ripping it up should clear the path.
Net 50 (Net-(Q4-Pad1)) is now ripped up alongside nets 15 and 58, so try routing /COM+ (net 32) with a via bridge.
Net 58 (/S_LA_V) failed with shove mode (mode=1) for both route_via and route; try route_via with walk-around (mode=2) to see if it can find a path.
With /SW_LD and /S_LA_V ripped up, route /COM+ (net 32) first using route_via to bridge under /GND and /LA+.
Net 61 (/S_LA_I) was just ripped up and has 2 open connections; try route_via to close them across layers.
With only 2 steps left and 7 open connections, restore the best board (1 open connection) and try one final action if possible.
Only 2 steps left, so ripping up another net would leave it unrouted; trying route with mode 2 (walk around) on net 58 as it has not been attempted yet.
We only have 2 steps left and 4 open connections after ripping up nets 15 and 58. Restoring the best board brings us back to 1 open connection, leaving 1 step to try routing net 32 in walk-around mode.
Net 61 (/S_LA_I) still has 1 open connection after route_via; try routing it on its current layer with shove mode.
With only one step left, try routing net 32 (/COM+) with route_via in walk-around mode (mode=2) to see if it can find a path.
Only 1 step remains and all route/route_via attempts on net 58 have failed; ripping up another net would leave it unrouted with 0 steps left, so stopping is best.
Only 1 step left; try route_via on /COM+ (net 32) with walk-around mode (mode=2) since shove mode failed.
bt-tnc (0492)
Open connections after each step
a rip-up pushes it up firstWhat Gemini decided
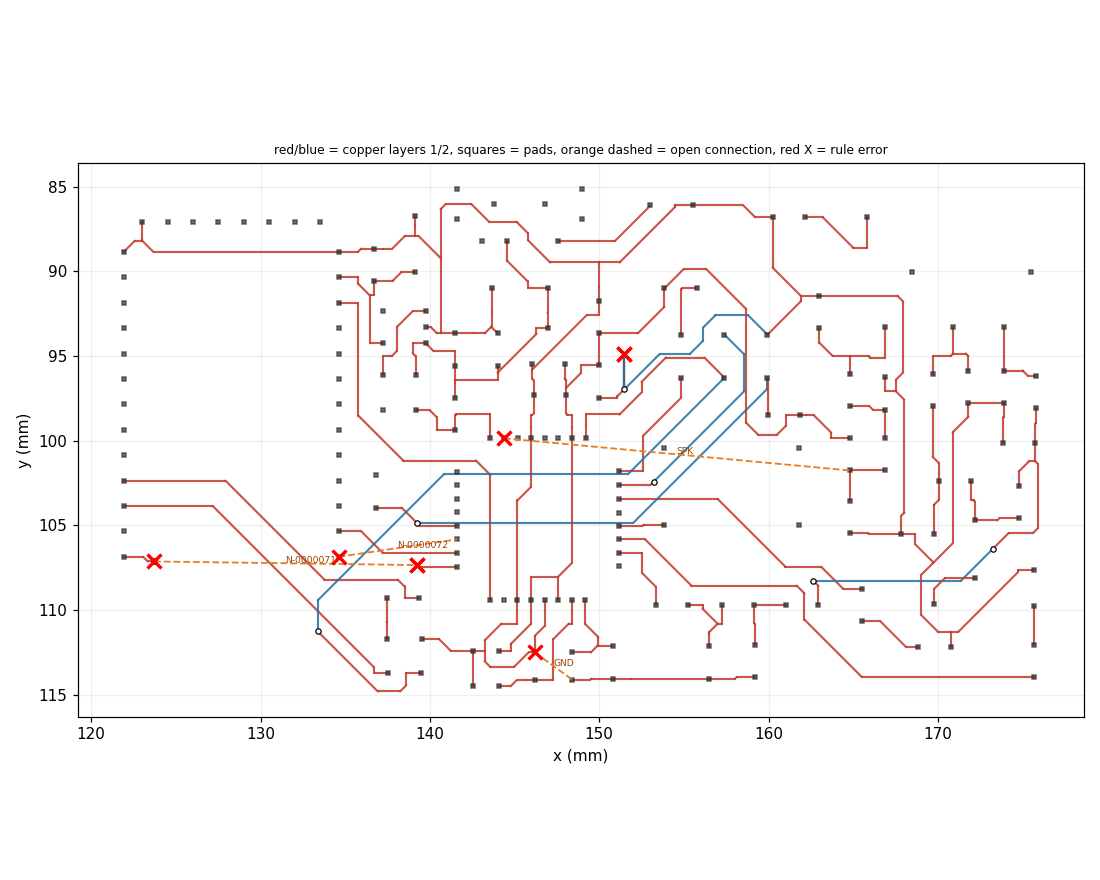
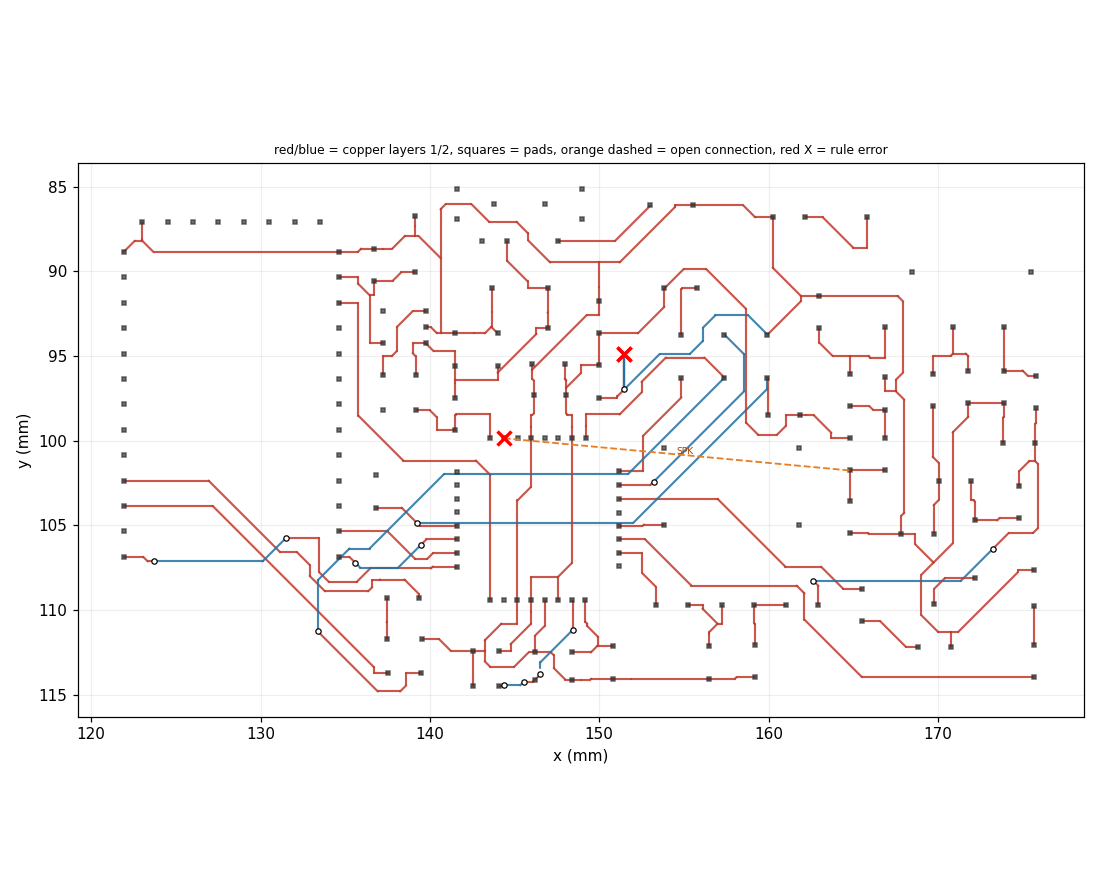
straight from llm_calls.jsonlReroute SCK first; its bottom trace blocks N-0000071, N-0000072, and SPK. Nudge 2-pad nets N-0000014, N-000006, and N-0000059 only where pad clearances require. Leave existing GND and VCC trunks, N-0000024, MOSI, and RESET alone to avoid cascading rip-ups. Use bottom-copper via bridges to tunnel the open GND link under N-0000024, and to route N-0000071 and N-0000072 under top traces once SCK moves. Route SPK with a mid-span layer change: bottom copper under GND, VCC, and MISO, then a via to top copper over MOSI and RESET.
Net 5 (GND) is a very short open connection (2.72 mm) crossed by only one trace; try routing it with shove mode first.
Net 5 (GND) has a very short 2.72mm open connection crossed only by net 19 on layer 0; routing it with vias should easily bridge over net 19.
Following layer-first style, try route_via on the shortest open connection (net 5, GND) which is only crossed on layer 0.
Net 5 (GND) is very short (2.72mm) and direct routing failed, so try routing it with a via.
Net 5 (GND) is blocked by net 19 (N-0000024), and route_via failed to close it. Ripping up net 19 will clear the path for net 5.
Following layer-first style, try route_via on the next open connection, net 31.
Net 32 is a short open connection (7.04 mm) with only two crossings; try routing it directly with shove mode.
Net 19 was ripped up to clear space around net 5 (GND). Now try routing net 5 with shove mode.
Following layer-first style, try route_via on open net 32 before ripping anything.
Net 31 is open and has not been attempted yet; try routing it with shove mode first.
Net 19 was ripped up to let GND route; now route net 19 with route_via so it can complete both connections and bridge over GND if needed.
Try route_via on net 38 (SPK) first following the layer-first style before ripping any blocking nets.
Net 31 failed to route on its current layer, so I will try route_via to see if a via bridge can close it.
Net 32 is the shortest open connection (7.04 mm) and has not been tried yet; attempting route_via with shove mode.
route_via failed on both GND (5) and SPK (38). Per the lead engineer note, SCK (37) blocks SPK, so rip up SCK to clear the path.
SCK (net 37) is blocking N-0000071 and SPK on the bottom layer, and route_via on N-0000071 just failed. Rip up SCK so we can reroute it out of the way.
Net 31 is open and has not been tried yet; try route_via with shove mode to bridge across the crossing nets.
SCK (net 37) was just ripped up; try routing it with route_via in shove mode.
SCK (net 37) was just ripped up; rerouting it with vias to clear both top and bottom layer crossings.
Only net 38 (SPK) remains open, and it needs a mid-span layer change to cross GND/VCC/MISO on bottom and MOSI/RESET on top.
SCK was rerouted in the previous step; try route_via on SPK (38) with walk-around mode (2) to see if a valid via path now exists.
SCK has been rerouted, so let's try routing SPK (net 38) using route_via to bridge across the remaining traces.
SPK (net 38) failed route_via and is blocked by SCK (net 37) on bottom copper. Rip up SCK first to clear space for SPK.
route_via on net 5 (GND) with mode 1 failed earlier; try mode 2 (walk around) to tunnel under N-0000024.
route_via with mode=1 failed for net 31; trying walk-around mode (mode=2) to see if it can find a via bridge without shoving.
SCK (net 37) is now ripped up, so route SPK (net 38) first using route_via to bridge across GND, VCC, MISO, MOSI, and RESET.
Both route_via modes failed for SPK (38) and GND (5). MISO (7) is a small 2-pad net crossing SPK, so ripping it up may clear the path for SPK.
Net 31 (N-0000071) failed route_via in both modes; ripping up 2-pad net 12 (N-0000014) which crosses it may clear the way for a via bridge.
SCK (net 37) was ripped up to clear space for SPK, and we haven't tried routing SCK yet. Let's route_via SCK first.
Net 7 (MISO) was just ripped up; try route_via on it now to close it using a layer change around SCK.
Net 12 (N-0000014) was just ripped up and has no crossings, so route it on its current layer with shove mode.
SPK (net 38) failed route_via even with SCK ripped up. Ripping up MISO (net 7, only 2 pads) on layer 0 will clear space for SPK to route.
route_via failed for GND (net 5) in both modes; try single-layer route with shove (mode 1) to see if it can complete or shove N-0000024.
GND (net 5) is a short 2.72mm connection crossed only by N-0000024; try route_via with walk-around mode (mode=2) to tunnel under it.
MISO (net 7) is currently ripped up, which clears space for SPK (net 38). Let's try routing SPK with vias now.
Net 5 (GND) failed route_via with mode 2 (walk around) and route with mode 1; trying route_via with mode 1 (shove) to place the via bridge under N-0000024.
GND (net 5) failed route_via in walk-around mode (mode 2); try shove mode (mode 1) to place a via bridge under N-0000024.
Net 7 (MISO) was ripped up and is only crossed by net 37 (SCK) on layer 2, so routing it with a via should easily complete it.
route_via failed for both net 5 and net 38; try route with shove (mode 1) on net 38 (SPK) to see if it can push through.
route_via on SPK (38) has only been tried in shove mode (1); try walk-around mode (2) to see if it can find a via bridge.
SPK (net 38) is still blocked even after ripping up SCK or MISO individually. Ripping up both MISO (7) and SCK (37) at once will clear the top-layer bottleneck so SPK can route with a via.
route_via and shove-mode route failed for SPK (38), so try walk-around mode (2) on SPK.
Net 31 (N-0000071) is blocked by small 2-pad nets including net 29 (N-000006). Ripping up net 29 may allow net 31 to route.
Both MISO (7) and SCK (37) are ripped up, clearing the path for SPK (38). Route SPK with a via bridge now.
SPK (net 38) failed route_via in walk-around mode (mode 2) and failed single-layer route in both modes; try route_via in shove mode (mode 1).
Net 29 (N-000006) was just ripped up and is crossed by net 12 on layer 0, so use route_via to bridge across it.
SPK (net 38) failed to route with mode 1 even with MISO and SCK ripped up. Restoring the best board (1 open connection) so we can try mode 2 on SPK.
SPK (38) and GND (5) are both stuck with route and route_via failing. SCK (37) crosses SPK on layer 0 and is a small 3-pad net, so ripping it up may allow SPK to route.
Net 31 (N-0000071) is still open after rerouting net 29, and route_via with shove (mode 1) has not been tried on it yet.
Only 2 steps left, so ripping up nets is not viable. Try route_via on SPK (net 38) with walk-around mode (mode 2) since shove mode failed.
SCK (net 37) was just ripped up; try routing it with via support to close its two open connections.
With 1 step left and all route_via attempts failing on the 3 open nets, try shoving on GND (net 5) to close its short 2.72mm gap.
route_via failed in both modes for net 38 (SPK), so try same-layer routing with shove mode on the final step.
SPK (net 38) failed route_via in mode 1, and we have 1 step left, so try route_via in walk-around mode (mode 2).
nixiebrd (0617)
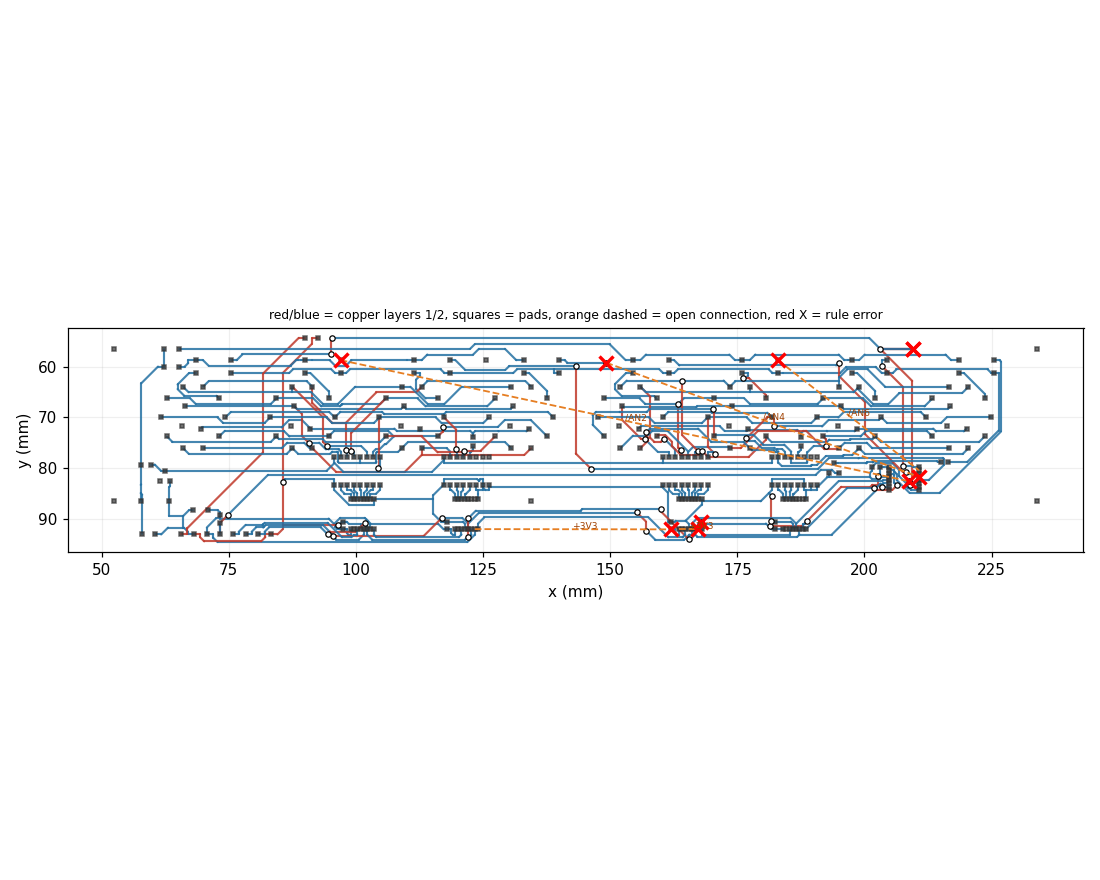
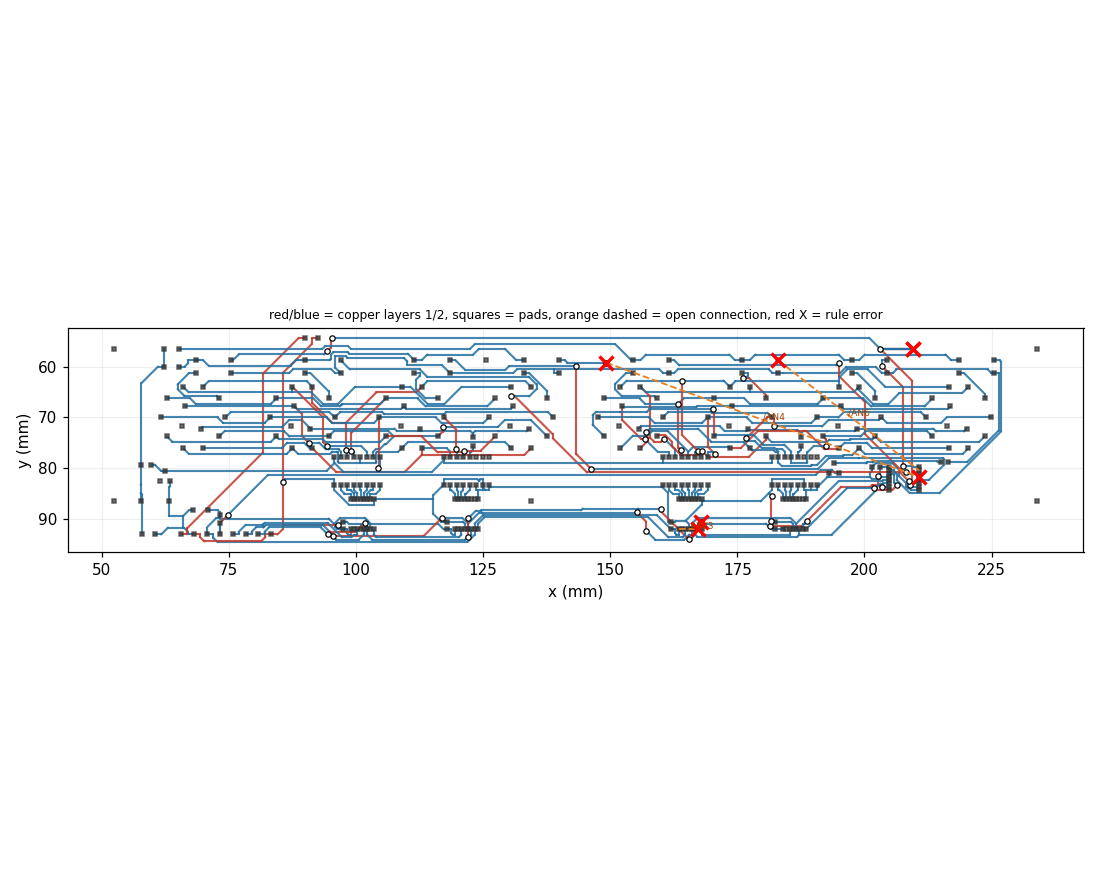
Open connections after each step
a rip-up pushes it up firstWhat Gemini decided
straight from llm_calls.jsonlMove first: Rip up and reroute 2-pad nets /AN5, /AN3, and /AN7, which block multiple open /AN* connections across both layers. Next, consolidate multi-layer crossings on /K18, /K13, /K14, and /K16 onto the bottom layer (blue) to clear top-layer routing channels. Leave alone: Do not disturb high-fanout nets GND (33 pads), +3V3 (18 pads), Net-(K1-Pad3), /RCLK, or /SCLK. Via bridges: Route /AN2, /AN4, and /AN6 primarily on the sparser top layer (red) over bottom-layer /K17, /K19, /KDP1, and GND, using short bottom-layer via bridges only to duck under /AN1. Route +3V3 on top over /SCLK and Net-(U11-Pad14), bridging onto bottom solely to cross /RCLK.
Net 1 (+3V3) has two open connections, including a very short 3.9 mm one; try routing it with vias first.
Net 1 (+3V3) has two open connections with relatively few crossings; trying route_via with shove mode to close them.
Following the layer-first style, try route_via on net 1 (+3V3) first to see if it can bridge across the blocking traces.
Net 1 (+3V3) could not be routed with route_via. Following the lead engineer note to move first on blocking 2-pad nets, I will rip up net 59 (/AN5) which blocks both /AN4 and /AN6 across both layers.
Rip up 2-pad nets /AN5 (59), /AN3 (57), and /AN7 (61) which block multiple open /AN* connections across both layers.
Layer-first style: try route_via on open net 56 (/AN2) before ripping anything.
Rip up 2-pad nets /AN3 (57) and /AN7 (61) as advised to clear multi-layer blockers for the open /AN* connections.
With /AN5, /AN3, and /AN7 ripped up, /AN6 is only blocked by /AN1 on the top layer and can be routed using a via bridge.
Following the layer-first style, try route_via on open net 58 (/AN4) before ripping up any blocking nets.
We ripped up /AN5, /AN3, and /AN7 as advised. Now let's route the shortest of them, /AN7 (net 61), using route_via to bridge across /AN1 on layer 0.
Try routing /AN7 (net 61), the shortest open /AN* connection, using via bridges now that /AN3 and /AN5 are out of the way.
Try route_via on net 60 (/AN6) before ripping any blocking nets, as it hasn't been tried yet.
route_via on net 61 failed, so try routing net 59 (/AN5) with via bridges to clear its open connection.
Try routing /AN2 (net 56) with via bridges in walk-around mode (mode 2) to see if it can find a path over the bottom-layer crossings.
route_via failed on nets 1, 58, and 60; ripping up 2-pad blocking nets /AN5 (59), /AN7 (61), and /AN3 (57) as advised.
/AN5 and /AN7 failed route_via in mode 1; try route_via on /AN6 (net 60) with walk-around mode 2 to duck under /AN1.
Rip up multi-layer nets /K18 (97) and /K16 (95) to clear top-layer routing channels for the open /AN* connections.
Net 61 (/AN7) was just ripped up and is the shortest open /AN* connection (21.89 mm); try routing it with vias first.
route_via failed on /AN7, /AN5, and /AN6; try routing the shortest open connection /AN7 (net 61) on its current layer with shove mode.
After ripping up /K18 and /K16 to clear space, try routing /AN4 (58) using via bridges.
Try route_via on /AN5 (net 59) now that /AN3 and /AN7 are ripped up.
Net 97 (/K18) crosses /AN3 and /AN4 on both layers; ripping it up will allow rerouting it onto the bottom layer to clear top-layer channels.
Net 95 (/K16) was ripped up to clear space; let's re-route it using shove mode so it consolidates cleanly before we tackle the /AN* nets.
Try route_via on /AN3 (net 57) before ripping up any crossing nets.
Net 97 (/K18) was just ripped up; try routing it with via bridges to clear its open connections.
We are at 13 open connections with 10 steps left, whereas the best board had only 5 open connections. Restoring the best board to work from a cleaner state.
route_via failed on /AN3, /AN4, /AN5, /AN6, and /AN7. Following the lead engineer note, rip up /K18, /K13, /K14, and /K16 to clear top-layer routing channels.
Try routing /AN4 (net 58) with via bridges, as we haven't attempted it yet since ripping up /AN3, /AN5, and /AN7.
Net +3V3 (1) has a short 3.9mm open segment crossed only on layer 2 and a 38.63mm segment; try routing it directly with shove mode.
Net 92 (/K13) was just ripped up and has multiple open connections; let's route it with route_via.
Net 56 (/AN2) has not been attempted with route_via yet; trying it now to see if a via bridge can close it.
Net 1 (+3V3) has only 1 short 3.9mm open connection left, and all its blockers are on layer 2, so route_via should be able to bridge it on layer 0.
Route /K14 (net 93) with route_via after it was ripped up in step 9.
Net 1 (+3V3) has two short open connections that may be solvable with a via bridge, and we haven't tried routing it yet.
Net 60 (/AN6) is currently open and hasn't been tried with route_via in this board state; trying route_via to bridge over blocking nets.
Net 1 (+3V3) has two open connections that have not been attempted yet; try route_via on it.
Net 57 (/AN3) was ripped up in step 1 and has not been routed yet; try route_via with shove mode.
Ripping up 2-pad net 59 (/AN5) which blocks both /AN4 and /AN6 on both layers.
We ripped up net 97 (/K18) in step 7 and haven't rerouted it yet; try route_via on net 97.
Net 55 (/AN1) is a small 2-pad net on layer 0 that blocks /AN4, /AN5, /AN6, and /AN7; ripping it up will clear top-layer access.
Net 59 (/AN5) was just ripped up; try routing it with via bridges now.
Now that /K18 and /K13 have been rerouted, retry route_via on /AN7 (net 61) which is the shortest open /AN* connection.
With /AN1 (net 55) ripped up, /AN4 (net 58) has fewer obstacles on the top layer; try route_via on net 58.
Net 59 (/AN5) was just ripped up and route_via failed; try direct routing with shove mode.
Net 60 (/AN6) is open and has not been tried with route_via in the current state; trying it next per layer-first style.
Net 59 (/AN5) has not been tried with route_via yet; try routing it with a via bridge to close one of the open /AN* connections.
Ripping up /AN5 (59) left us with 5 open connections and routing it failed; restore_best will return to the 4-open-connection state.
Only 3 steps remain and we currently have 10 open connections, worse than the 7 open connections seen earlier. Restore the best board state first.
We are at 8 open connections while the best state had 7; restoring the best board first.
With only 2 steps left, ripping up a net would leave it open, so try route_via on open net 58 (/AN4) in the current 4-open state.
Try route_via on /AN4 (net 58) to see if it can bridge over the crossings without ripping anything.
With 1 step left after restoring the best state (5 open connections), try route_via on net 60 (/AN6) which is a relatively short 35.15mm open connection.
Net 56 (/AN2) has not been attempted with route_via yet; try routing it with vias on the last step.
Last step: try route_via on net 60 (/AN6) on the current 4-open board to see if a via bridge can close it.
sweet-sixteen (0658)
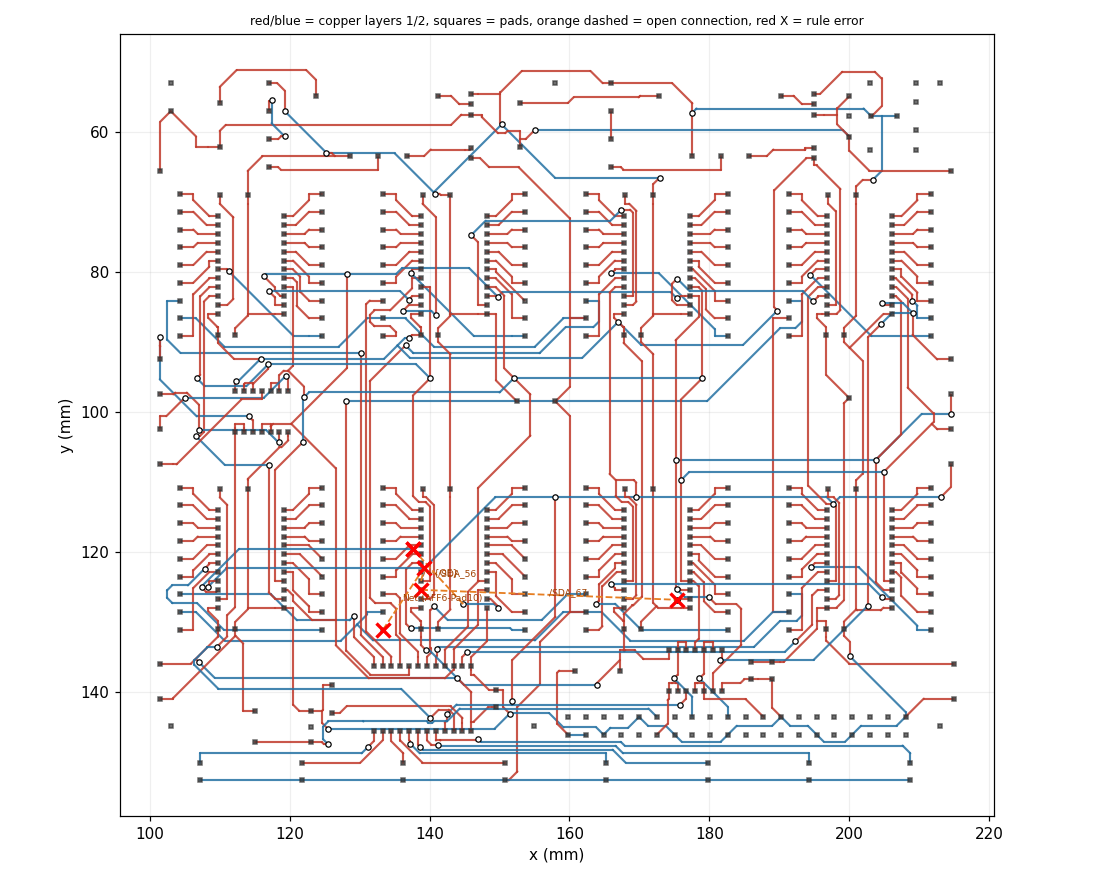
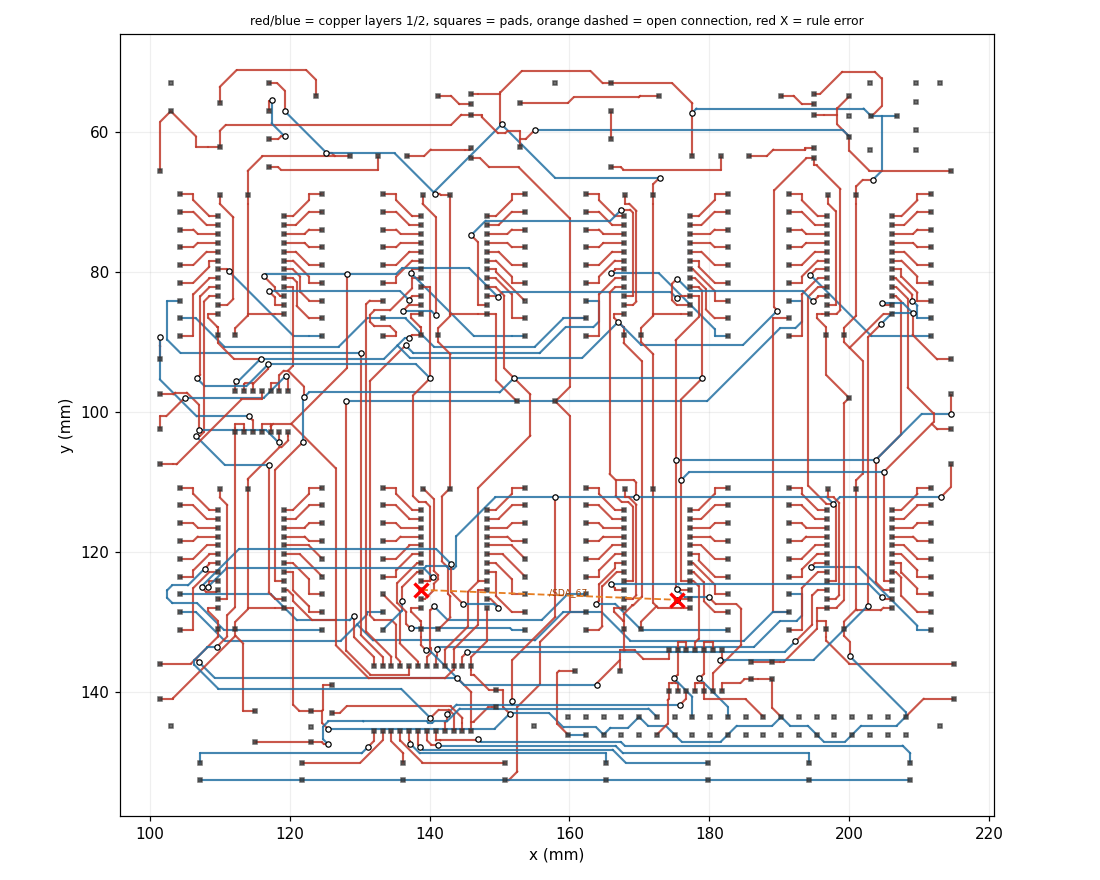
Open connections after each step
a rip-up pushes it up firstWhat Gemini decided
straight from llm_calls.jsonlLeave alone: Multi-pad global nets GND, /VLED, and existing /~{OE} segments (though connect /~{OE}'s short unblocked 1.8mm gap immediately). Move first: Reroute local 2-pad nets around the (138, 125) congestion zone—specifically Net-(AFF7-Pad12) (blocking bottom copper) and top-layer nets Net-(AFF6-Pad13) and Net-(R6-Pad2) to clear space for /SDA_56 around /~{OE}. Via bridges: Bottom copper is largely open here. Drop Net-(AFF6-Pad10) to bottom copper to bypass Net-(AFF2-Pad12), Net-(AFF6-Pad12), and Net-(AFF6-Pad9). Route /SDA_56 and /SDA_67 horizontally on bottom copper to cleanly bridge under top-layer GND, /VLED, and AFF6/AFF7 pad nets.
Net 156 is only 1.83 mm long with no crossings, so routing it directly with shove mode should close it cleanly.
Net 156 is a very short 1.83mm open connection with no crossings, so try routing it directly with shove mode first.
Following layer-first style, try route_via on the short open connection net 156 first.
Net 102 (Net-(AFF6-Pad10)) is crossed only by top-layer nets; use route_via to bridge it on bottom copper.
Net 156 failed to route on its current layer despite no crossings, so it likely needs a layer change or via bridge.
Net 102 is only crossed on layer 0, so a via bridge to bottom copper should close it cleanly.
Net 156 (/~{OE}) has a short 1.83mm unblocked gap, and since same-layer shove routing failed, trying route_via may complete it by changing layers.
Net 102 (Net-(AFF6-Pad10)) is only crossed by top-layer nets, so route_via should be able to drop it to bottom copper cleanly.
Following layer-first style, try route_via on open connection net 180 (/SDA_56) to bridge under top-layer obstacles.
Try routing /SDA_56 (net 180) with a via bridge to see if it can cleanly bypass the top-layer crossings on bottom copper.
Net-(R6-Pad2) (166) blocks both /SDA_56 and /SDA_67, and Net-(AFF7-Pad12) (116) blocks bottom copper for /SDA_67. Ripping up both clears the congestion zone.
Only net 181 (/SDA_67) remains open, and all its crossings are on layer 0. Try route_via to bridge it on bottom copper.
Net 181 (/SDA_67) is the last open connection and is crossed only by top-layer nets, so a via bridge to bottom copper should complete it.
With nets 116 and 166 ripped up to clear the congestion zone, route /SDA_56 (net 180) using via bridges to bypass top-layer GND and /~{OE}.
route_via on net 181 (/SDA_67) failed, so rip up the crossing 2-pad net 166 (Net-(R6-Pad2)) to clear space for routing.
Net 181 (/SDA_67) failed route_via in 90 trials; rip up the 2-pad net 166 (Net-(R6-Pad2)) that crosses it in the congestion zone to free up space for a via bridge.
Route /SDA_67 (net 181) using route_via to bridge under the top-layer nets on bottom copper, as recommended by the lead engineer.
Net 166 was just ripped up; try routing it with vias to close it cleanly.
Net 166 was just ripped up to clear space around (138, 125). Try routing /SDA_67 (net 181) with via bridges now that the congestion is reduced.
route_via on net 181 failed; try route_via on net 166 (Net-(R6-Pad2)) which is shorter and only crossed by nets 156 and 180.
route_via failed on both open nets 166 and 181. Net 116 (Net-(AFF7-Pad12)) is a 2-pad net blocking bottom copper for net 181 (/SDA_67), so rip up net 116 to clear the path.
Net 116 (Net-(AFF7-Pad12)) is on bottom copper (layer 2) and crosses /SDA_67 (net 181), blocking its via bridge. Rip up net 116 to clear bottom copper for /SDA_67.
Net 116 (Net-(AFF7-Pad12)) is open after being ripped up, and we have not tried routing it with vias yet. Try route_via on net 116.
Net 116 was blocking bottom copper around (138, 125); now that it is ripped up, try route_via on net 181 (/SDA_67) to bridge horizontally on bottom copper.
Net 116 was ripped up to clear bottom copper; try route_via on net 181 (/SDA_67) now.
route_via with shove (mode 1) failed for net 181 (/SDA_67); try walk-around (mode 2) to see if it can route around the pad congestion and drop to bottom copper.
Net 116 (Net-(AFF7-Pad12)) is open and hasn't been tried with route_via yet; try routing it with a via bridge.
Ripping up nets 166 and 116 did not allow net 181 to route via, so restore_best to return to the 1-open-connection state.
Net 180 (/SDA_56) is a 2-pad net crossing both open nets 166 and 181. Ripping it up will clear space to route 166 and 181.
Net 116 was ripped up in step 7, which may have cleared space near (138, 125) for Net 166. Trying route_via on Net 166.
Net 181 (/SDA_67) is the only open connection left, and route_via with mode=1 failed. Try route_via with mode=2 (walk around) to see if it can find a valid via bridge.
Now that /SDA_56 (180) is ripped up, try routing /SDA_67 (181) with via bridges.
route_via with mode 1 failed on 181, so try route_via with walk-around (mode 2) to see if it can find a path on bottom copper.
Net 181 (/SDA_67) failed route_via in both modes; ripping up 2-pad net 180 (/SDA_56) which crosses it and was recently routed may free the needed via site or path.
We are at 4 open connections and only have 7 steps left, whereas our best board had only 2 open connections. Restoring the best board gives us a much better starting point.
route_via failed on all three open nets. Rip up Net-(AFF8-Pad12) (133), a 2-pad net crossing Net-(AFF7-Pad12) (116) twice on both layers, to clear a path.
Restore the best board state where /SDA_56 (net 180) is already routed, leaving only /SDA_67 (net 181) open.
Net 116 (Net-(AFF7-Pad12)) is on bottom copper blocking /SDA_67 (net 181). Ripping up net 116 alone gives us a chance to route 181 and 180 within the remaining 6 steps.
We just ripped up net 133, which may have cleared space for /SDA_67 (net 181). Let's try route_via on net 181.
Net 181 failed route_via in both modes; try routing it on its current layer with shove mode.
Net 166 (Net-(R6-Pad2)) crosses both /SDA_56 (180) and /SDA_67 (181) on the top layer; ripping it up will clear space for both.
We went from 1 open connection to 4 open connections and route_via is still failing on net 181. Let's restore the best board (1 open connection) and try a different approach.
Net 181 (/SDA_67) is still open and route/route_via failed; rip up Net-(AFF6-Pad7) (100) which crosses it to see if it frees a path or via site.
With 116 and 166 ripped up, try routing /SDA_67 (181) using route_via.
Net 181 (/SDA_67) is the only open connection and all its crossings are on layer 0; try route_via to bridge under them on bottom copper.
Net 100 was just ripped up; try routing net 181 with vias now that space may be cleared.
With nets 116 and 166 ripped up, try routing /SDA_56 (net 180) using via bridges.
Net 181 (/SDA_67) failed route_via with mode 1. Rip up the local 2-pad blocker net 166 (Net-(R6-Pad2)) near the congestion zone so we can route 181 and then re-route 166 in the remaining steps.
Net 100 has no crossings and was ripped up in step 9; routing it now should close it.
With only 2 steps left and all 3 open nets failing route_via, restoring the best board (2 open connections) is the optimal move.
Net 166 was just ripped up to clear space; now try route_via on net 181 (/SDA_67) in shove mode.
Only 1 step left; try routing net 181 with mode 2 (walk around) since mode 1 failed.
Net 180 (/SDA_56) was successfully routed with route_via in step 9, so let's route it now to reduce open connections from 2 to 1.
With only 1 step left and 2 open connections, restoring the best board (1 open connection, 0 errors) is the best action.